A Primer on Junk Email and Whitelisting
Initiates to the world of communication via email might naïvely hope that every email that they receive either is a reply to a message or to a request that they had previously sent, or is an unexpected email from a contact or one from a non-contact that contains information that is of interest or benefit to them. The reality is far from that idyll!
Ever since the widespread take-up of email in the 1980s, various people and organizations have been "harvesting" email addresses to form mailing lists. Before you know it, you start receiving emails from companies advertizing things you do not want or need, emails from political and activist organizations promoting some cause or ideology, emails from malicious parties who wish to trick you into revealing information that enables fraud, theft of money or even theft of identity (where the criminal gathers enough information from you to start operating in the cyber world as if they were you) and the list goes on
People refer to these sorts of emails as "junk mail" or "spam". ("Spam" is a reference, through a popular comedy sketch on British television, to a tinned, processed meat marketed as 'Spam'. 'Spam' was ubiquitous following World War 2 due to fresh meat shortages.) Spam email can range from annoying to downright dangerous. Sometimes spam is sent not with you in mind at all, but to multiple users at once with the malicious intent of clogging up the system
By one measure, in 2008 the proportion of all email sent that was junk email was a jaw-dropping 92.6%, the peak year for junk email. The trend since 2008 has been a decrease, but even in 2019 the figure was 28.5% (Source: Statista, https://www.statista.com/statistics/420400/spam-email-traffic-share-annual/, retrieved 26 October 2020)
There has been considerable investment made by email-handling software companies into separating out the "real" email from the "junk" email. Each software company has their own (mostly proprietary, but some open-source) techniques to do this. A lot of the junk email is simply deleted by the email server. Some email which the algorithm thinks is probably junk but wants to give you an opportunity to vet it, is placed into a folder variously called "Junk" or "Spam" or some similar name, but not in the regular "Inbox"
A criterion for judging the quality of an email-handling software product is the sensitivity (correctly identifying junk emails as junk) and specificity (not mistakenly identifying real emails as being junk).
This last point is important: any email handler can inadvertantly mark as junk an email that is not junk. If your friend sends you a humorous email and puts something whimsical in the Subject field of the email, or something in the body of the email that a human would know is sarcasm but a machine would not, then these actions can result in your friend's email being consigned to the Junk folder! But we, the user, can help our email handler to be specific
For some email handlers, all email from a specific email address will always be let through to the Inbox if you ensure that the email address is in your Contacts List / Address Book (the terminology varies).
Some email handlers give you the option of flagging an email it has put in the Junk folder as not being junk at all. If this happens a number of times, the algorithm "learns" that this sender is a safe sender and that their email can always be let through to the Inbox
By far the safest way of ensuring email that you want does not inadvertantly get consigned to the Junk folder is to add that email address, or even the whole domain name (so that anyone with an email address that is @ that domain name is covered) to your email handler's Safe Senders / Trusted Senders / Whitelist. The terminology varies, as does the process for adding an email address or whole domain, but any good email handler should have such a facility
Below are given step-by-step instructions for the web-based email handlers that are the default software for interacting with many common email servers. If your email server is not in that list, a process that is similar to those below should be able to be found
In these instructions, wherever you see the expression safesender replace that expression with the name of the domain or the email address you are wishing to whitelist
The exact appearance of the displays may vary slightly, depending on the computer platform you are using and the web browser you are using
Gmail (Google Mail)
Your email address is of the form username@gmail.com
Open the web browser that you usually use on your computing device. Go to the Google website by typing in the URL
google.com
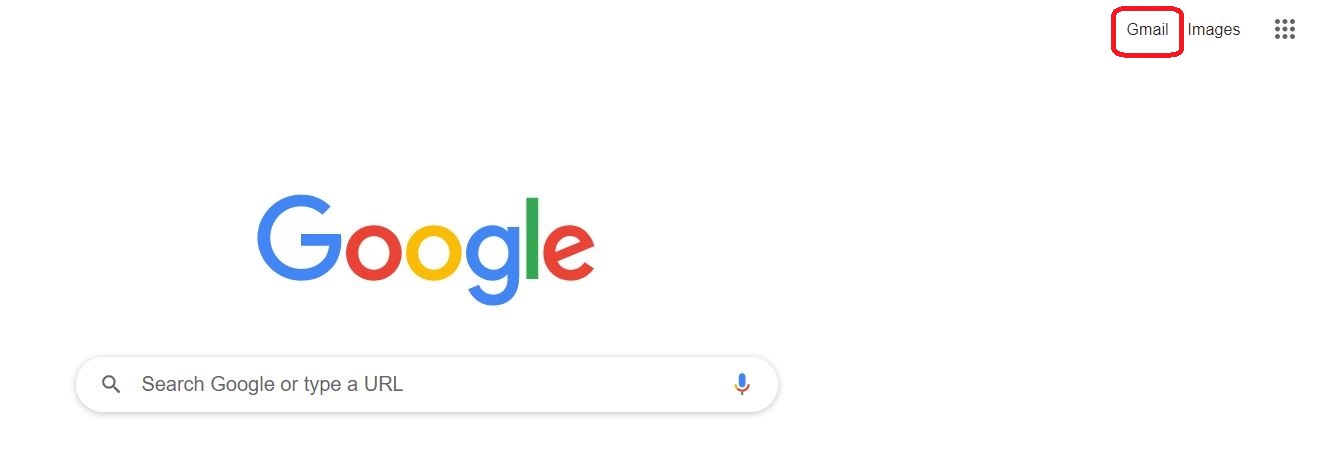
⇩ In the upper right hand corner of the window, click on the link labelled 'Gmail'. Depending on whose computing device you are using, and depending on certain settings that may be in force even on your own device, you may be requested to login to your email account
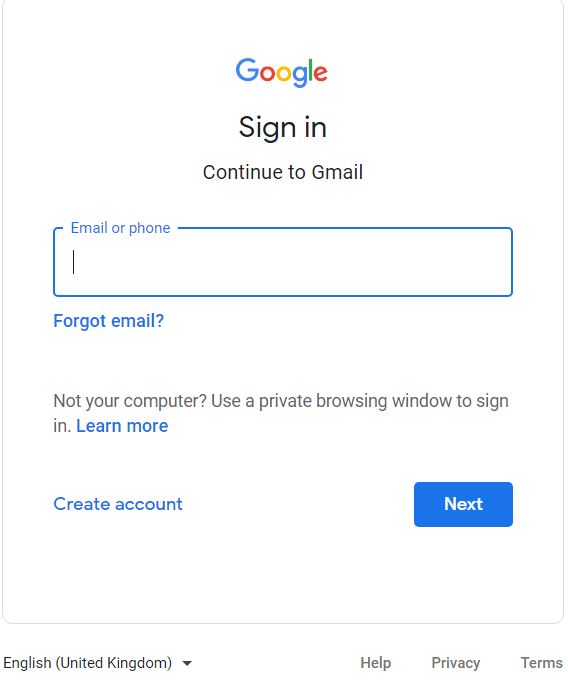
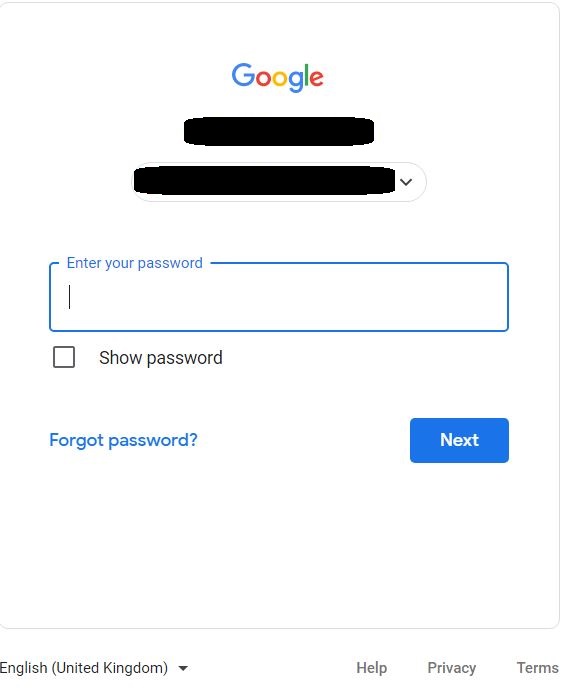
 ⇩ These windows will appear in succession if you are required to enter your login credentials
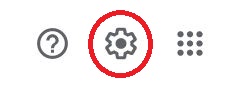
 ⇩ In the upper right hand corner of the Gmail window, click on the cog-wheel symbol
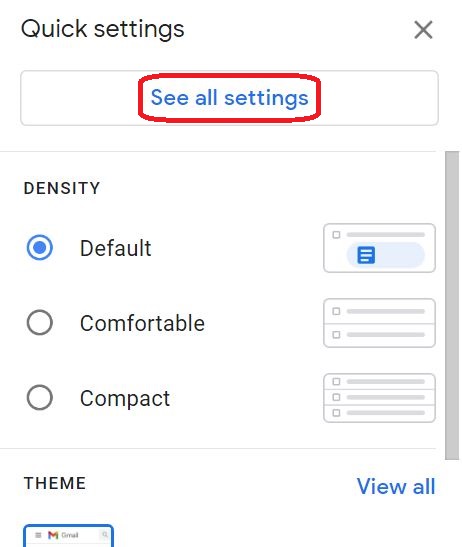
 ⇩ A settings window will appear, but you'll need to click on the option to 'See all settings'
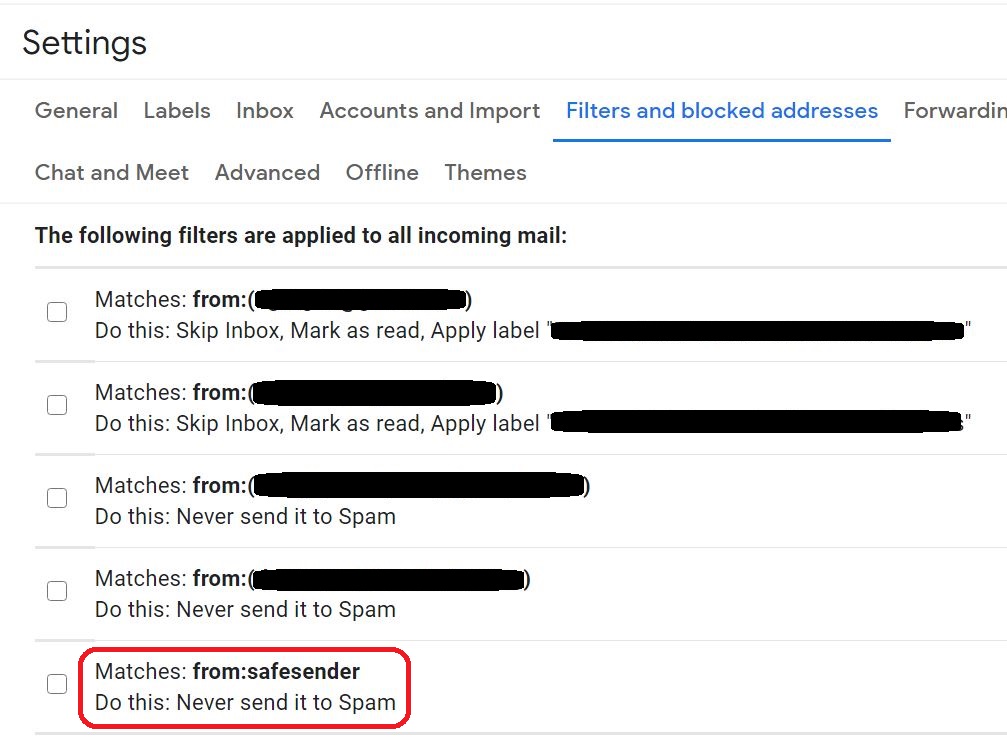
 ⇩ A huge array of settings, grouped into tabs, will now be available to you. Click on the tab for 'Filters and blocked addresses'
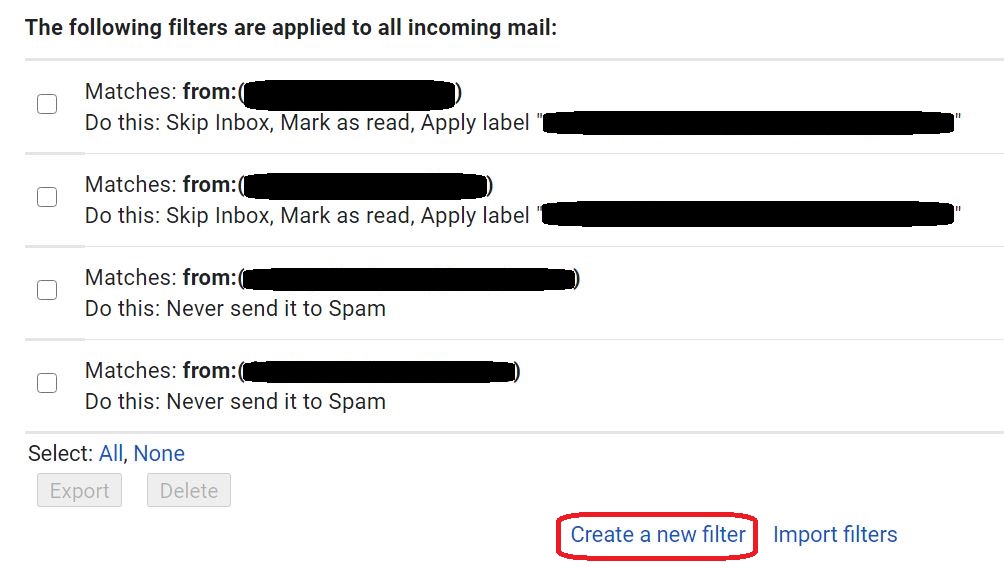
 ⇩ In the example below, you'll notice that there are already four filters in effect. The one you are going to create will look like the bottom two once you've finished. Click on the link at the bottom right to 'Create a new filter'
 ⇩ There are all manner of ways that you can identify emails that you wish this new filter to apply to. You are going to create a filter that applies simply to all emails from the explicit email address / domain name safesender . So, in the field labelled 'From', type the explicit email address / domain name ' safesender ' and then click on the link at the bottom right to 'Create filter'
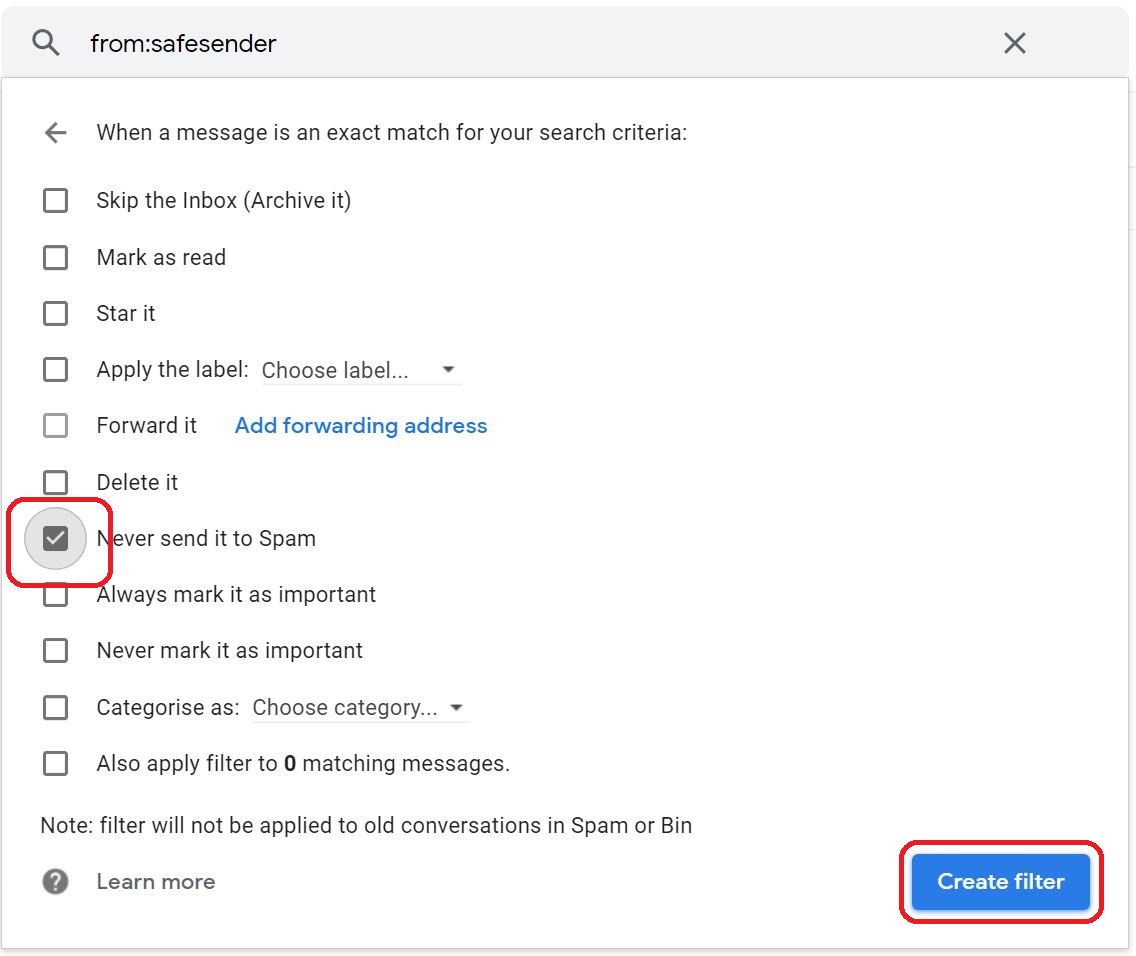
 ⇩ The next window asks what you wish to do with all emails that are from the explicit email address / domain name safesender . You are going to simply check the checkbox next to 'Never send it to Spam'. Then at the bottom right click on the link 'Create filter'
 ⇩ Success! If you are not using your own private computer, you should logout of Google now. You may now just simply close the web browser window
Outlook (Microsoft Mail)
Your email address is of the form username@outlook.com
or one of the older Microsoft email addresses of the form username@hotmail.com, username@live.com, username@msn.com, username@passport.com, username@passport.net, either with or without a country code extension such as '.au'
Open the web browser that you usually use on your computing device. Go to the Outlook website by typing in the URL
outlook.com
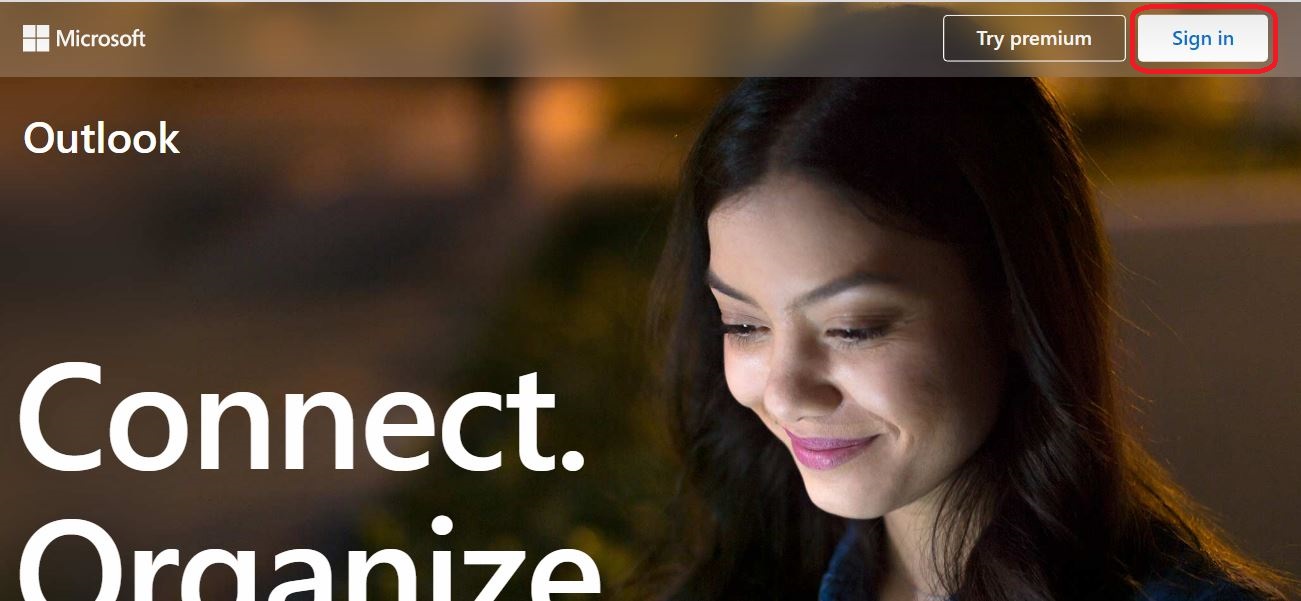
⇩ In the upper right hand corner of the window, click on the link labelled 'Sign in'. Depending on whose computing device you are using, and depending on certain settings that may be in force even on your own device, you may be requested to login to your email account
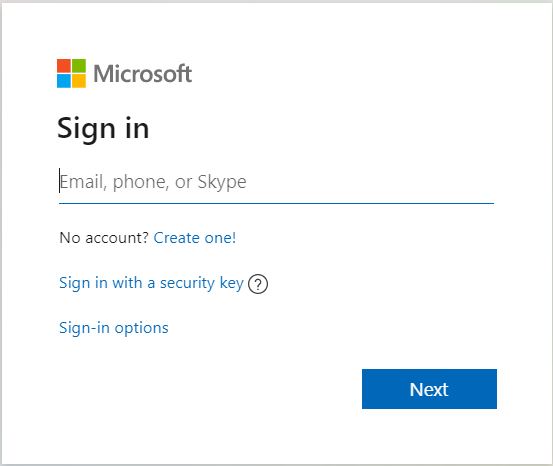
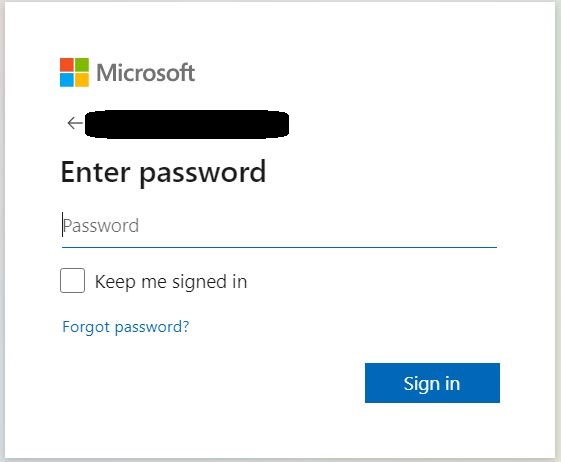
 ⇩ These windows will appear in succession if you are required to enter your login credentials
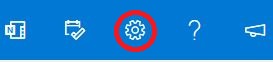
 ⇩ In the upper right hand corner of the Outlook window, click on the cog-wheel symbol
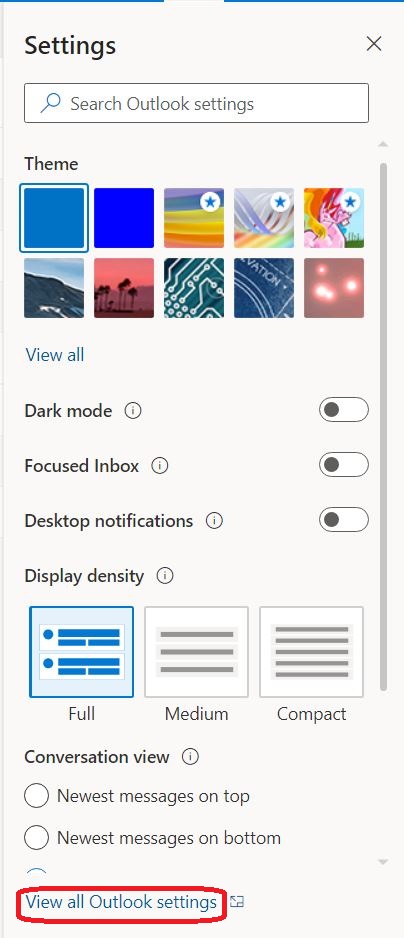
 ⇩ A settings window will appear, but you'll need to click on the option at the bottom to 'View all Outlook settings'
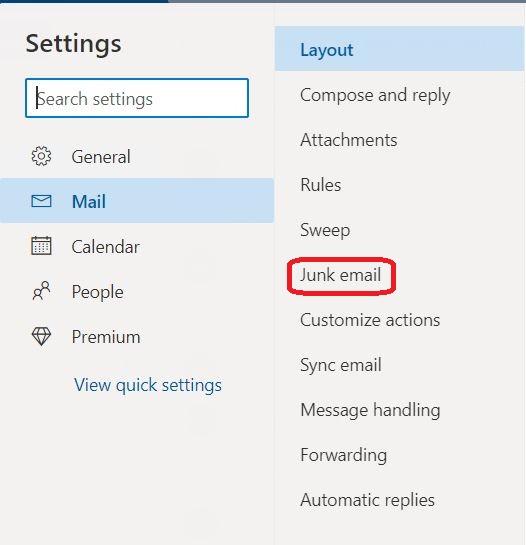
 ⇩ A huge array of settings, grouped into tabs, will now be available to you. Click on the tab for 'Junk email'
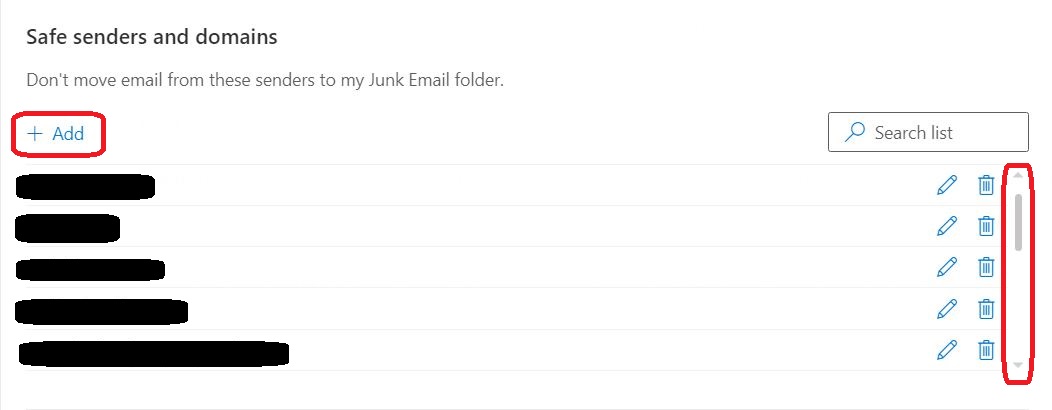
 ⇩ In the example below, you'll see that there are already five explicit email addresses / domain names set. (But notice the little scroll bar that applies to just this bit of the window: there are even more listed if you scroll down.) You are going to add a new safe explicit email address / domain name to this list. Click on '+ Add' and in the input box that appears type safesender and then press the enter key
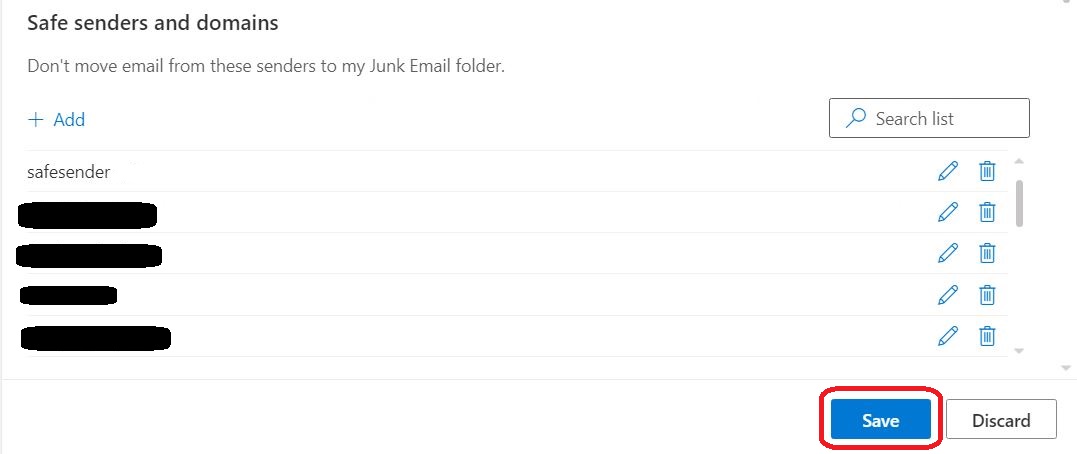
 ⇩ The new explicit email address / domain name now appears at the top of the list. (When this window next refreshes, this will appear in its alphabetical position in the list.) Make sure you 'Save' this new safe explicit email address / domain name by clicking on the 'Save' button. Success! Close the Settings window. If you are not using your own private computer, you should logout of Outlook now. You may now just simply close the web browser window
Yahoo! Mail
Your email address is of the form username@yahoo.com
either with or without a country code extension such as '.au'
Open the web browser that you usually use on your computing device. Go to the Yahoo! website by typing in the URL
yahoo.com
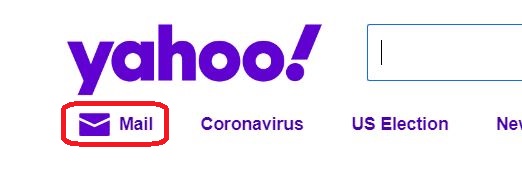
⇩ In the upper left hand corner of the window, click on the link for 'Mail'. Depending on whose computing device you are using, and depending on certain settings that may be in force even on your own device, you may be requested to login to your email account
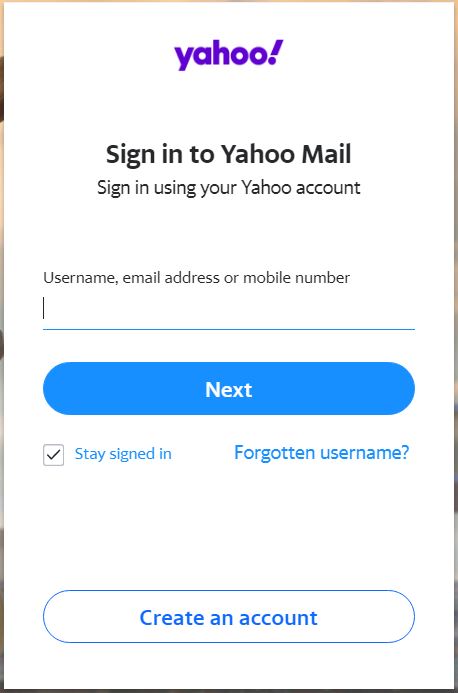
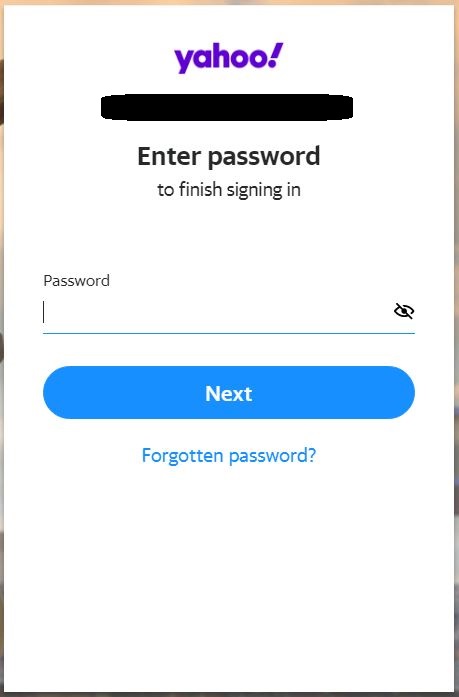
 ⇩ These windows will appear in succession if you are required to enter your login credentials
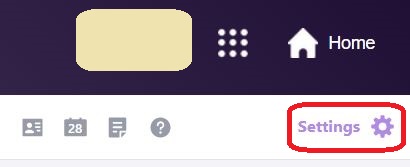
 ⇩ In the upper right hand corner of the Yahoo Mail window, click on the cog-wheel symbol
 ⇩ A settings window will appear, but you'll need to click on the option at the bottom to see '... More settings'
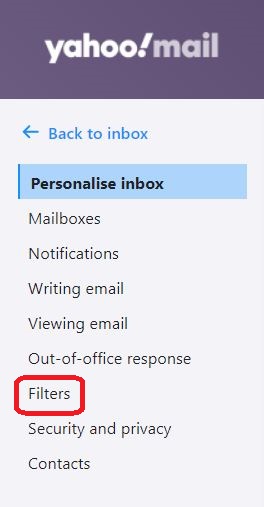
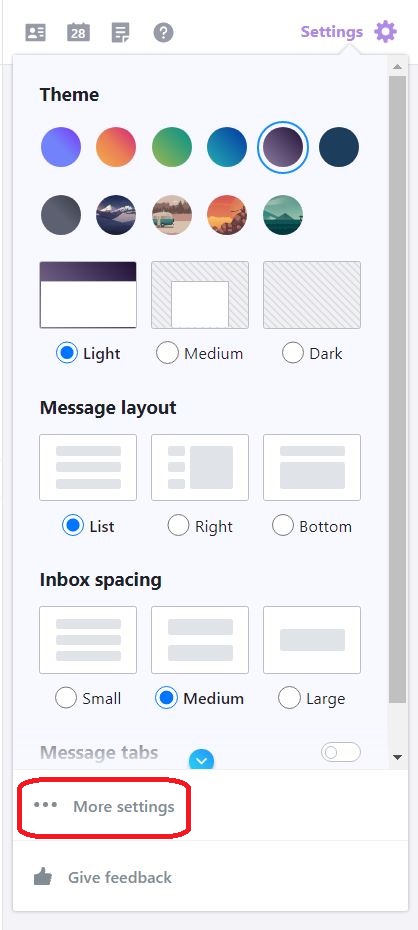 ⇩ A huge array of settings, grouped into tabs, will now be available to you. Click on the tab for 'Filters'
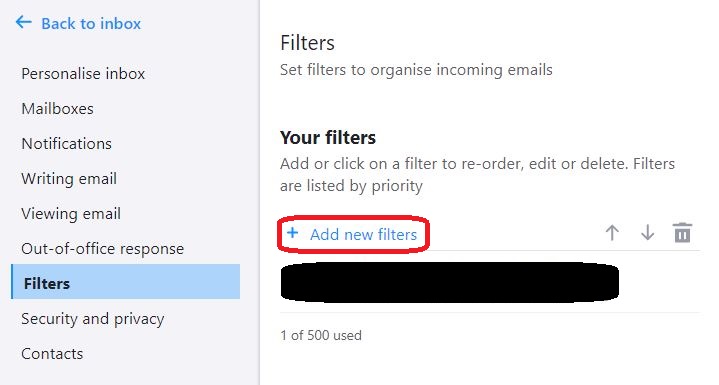
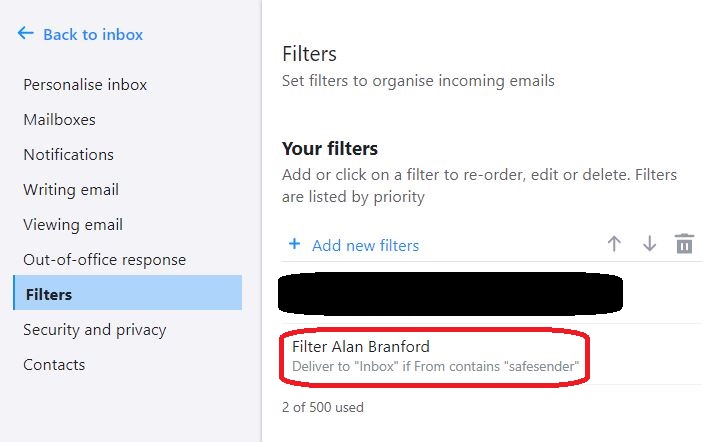
 ⇩ You are going to add a new filter to this list. Click on '+ Add new filters'
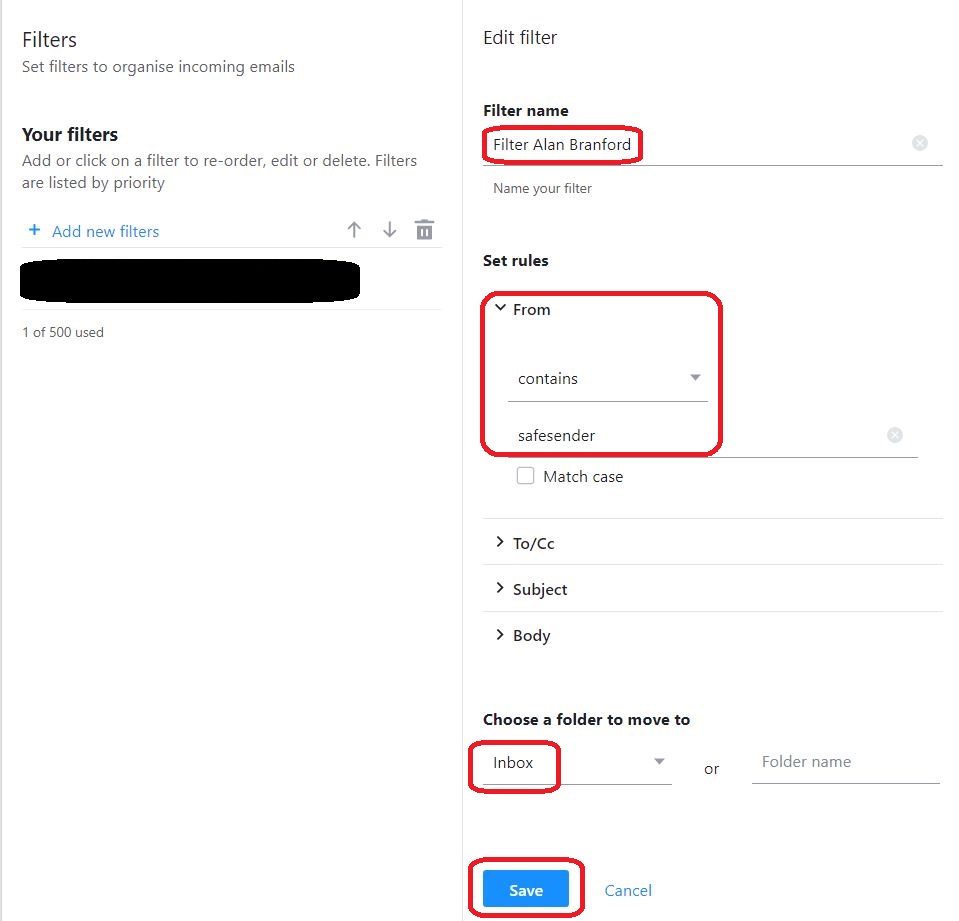
 ⇩ The red ovals indicate the fields that you are to fill in, and the 'Save' button for when you are finished
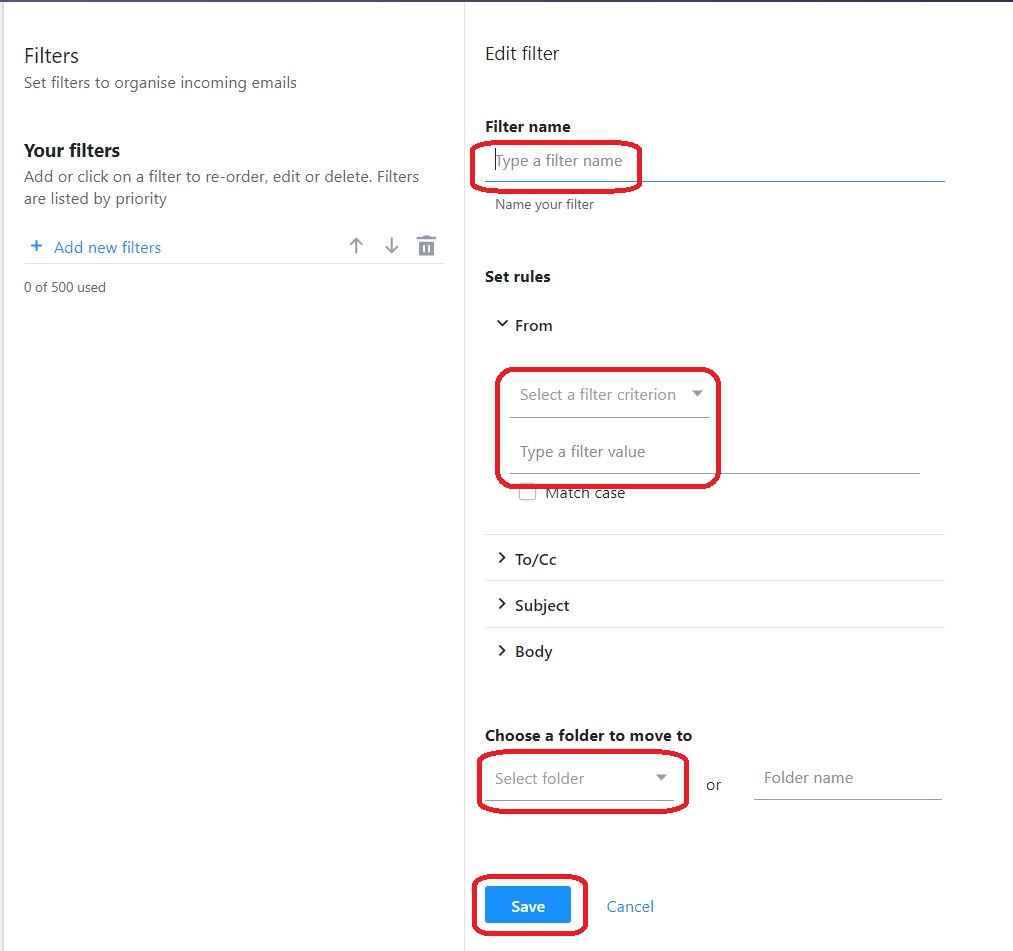 ⇩ There is the facility to give a convenient name to this filter. Next, we wish the filtering mechanism to grab all emails that come 'From' an email address whose name 'contains' (select this from the drop-down arrow's menu) our explicit email address / domain name ' safesender ' and insist that this email is sent to the folder named 'Inbox' (select this from the drop-down arrow's menu); in other words you are instructing the email server not to put this email in the 'Junk' folder. Make sure you 'Save' this new filter by clicking on the 'Save' button
 ⇩ Success! In the upper left corner, use the link to return to the Yahoo Mail inbox. If you are not using your own private computer, you should logout of Yahoo now. You may now just simply close the web browser window
Telstra Mail
Your email address is of the form username@telstra.com
or one of the older Telstra email addresses of the form username@bigpond.com or username@bigpond.net.au
★ Internet Service Providers (ISPs) will typically allocate for you at least one email address that they will host on their server. When the ISP wishes to email you something, they will likely use that email address. You, however, are not obliged to make this supplied email address your usual email address. You are still at liberty to create Gmail addresses, Outlook addresses etc. and to access these via your internet connection. Some people have their ISP-supplied email address set up to automatically redirect any email it receives to the user's usual email address. This section is only for Telstra customers who are actually using the Telstra-supplied email address as their usual email address
Open the web browser that you usually use on your computing device. Go to the Telstra website by typing in the URL
telstra.com
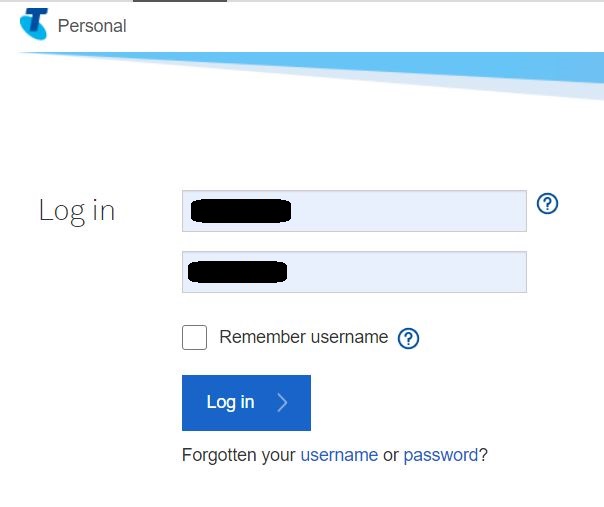
⇩ In the upper right hand corner of the window, click on 'Sign in'
 ⇩ From the drop-down menu, select 'Telstra Mail'. Depending on whose computing device you are using, and depending on certain settings that may be in force even on your own device, you may be requested to login to your email account
 ⇩ This window will appear if you are required to enter your login credentials
 ⇩ In the upper right hand corner of the mailbox window, click on 'Settings'
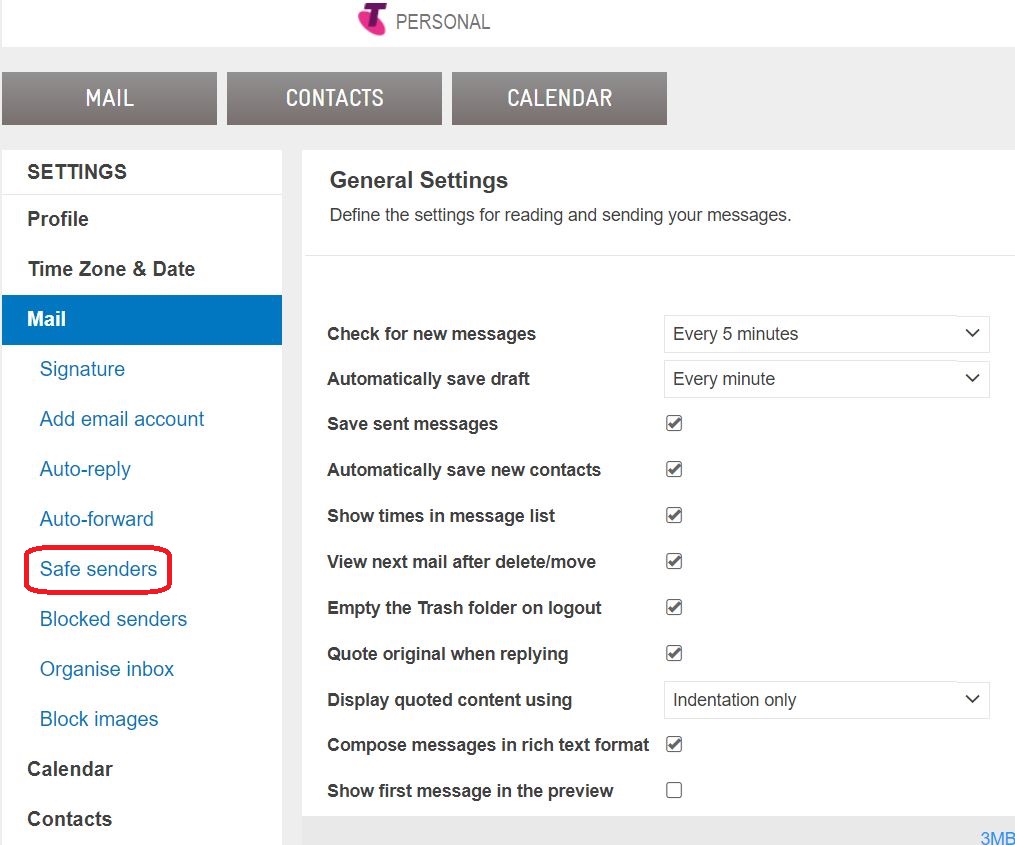
 ⇩ A settings window will appear, but you'll need to click on the option for the 'Mail' settings
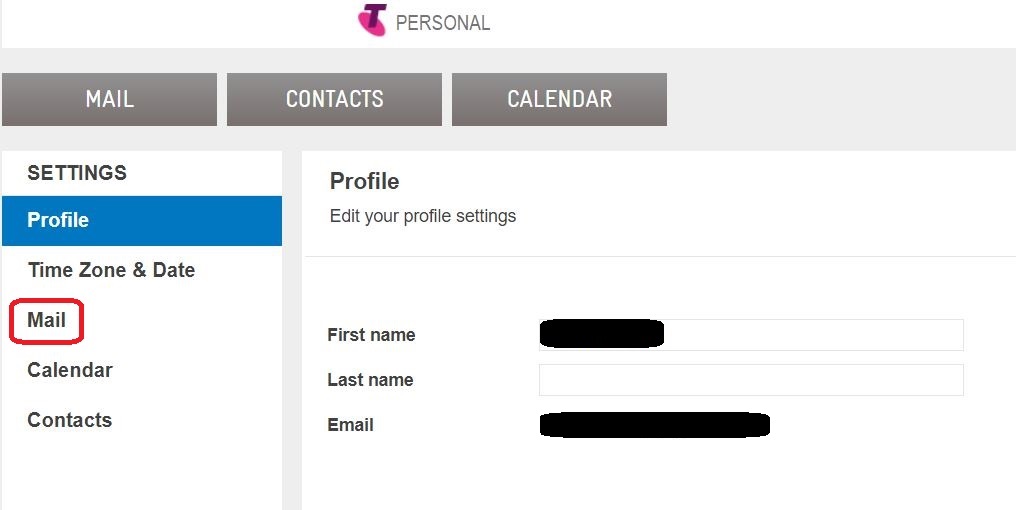 ⇩ A huge array of settings, grouped into tabs, will now be available to you. Click on the tab for 'Safe senders'
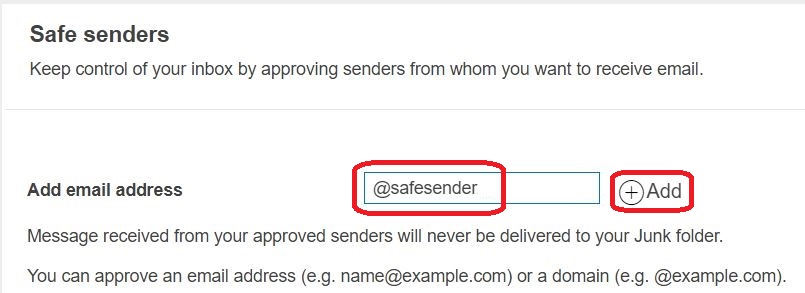
 ⇩ You are going to add a new safe explicit email address / domain name to the list. Click in the input box and type safesender and then click on '+ Add'. (If safesender is a domain name, then you need to type @safesender '.) Success! The explicit email address / domain name now appears at the bottom of the list (you may need to scroll down to see it if there are already a number of safe senders). Alas, there does not appear to be any way to sort these names into alphabetical order. If you are not using your own private computer, you should logout of Telstra now using the 'Logout' in the top right hand corner of the window. You may now just simply close the web browser window
Internode Mail
Your email address is of the form username@internode.on.net
★ Internet Service Providers (ISPs) will typically allocate for you at least one email address that they will host on their server. When the ISP wishes to email you something, they will likely use that email address. You, however, are not obliged to make this supplied email address your usual email address. You are still at liberty to create Gmail addresses, Outlook addresses etc. and to access these via your internet connection. Some people have their ISP-supplied email address set up to automatically redirect any email it receives to the user's usual email address. This section is only for Internode customers who are actually using the Internode-supplied email address as their usual email address
Open the web browser that you usually use on your computing device. Note that Internode does not give access to the settings required to setup Safe Senders etc. from the Internode Webmail application. You have to go via your Internode Account. Go to the Internode website by typing in the URL
internode.on.net
⇩ In the upper right hand corner of the window, click on 'Login'
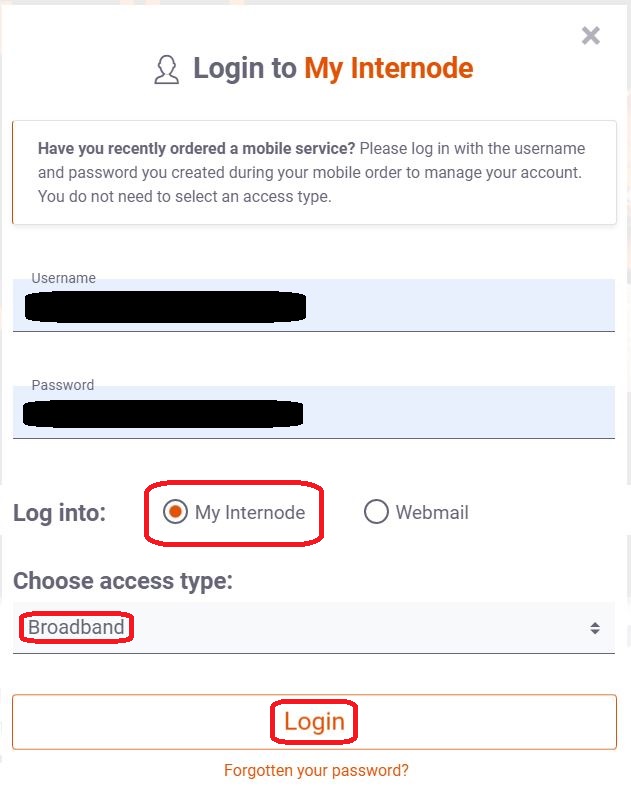
 ⇩ Enter your username (including the '@internode.on.net' bit) and password. Check that the 'My Internode' radio button is selected and that your access type is 'Broadband'. Then click on the 'Login' button
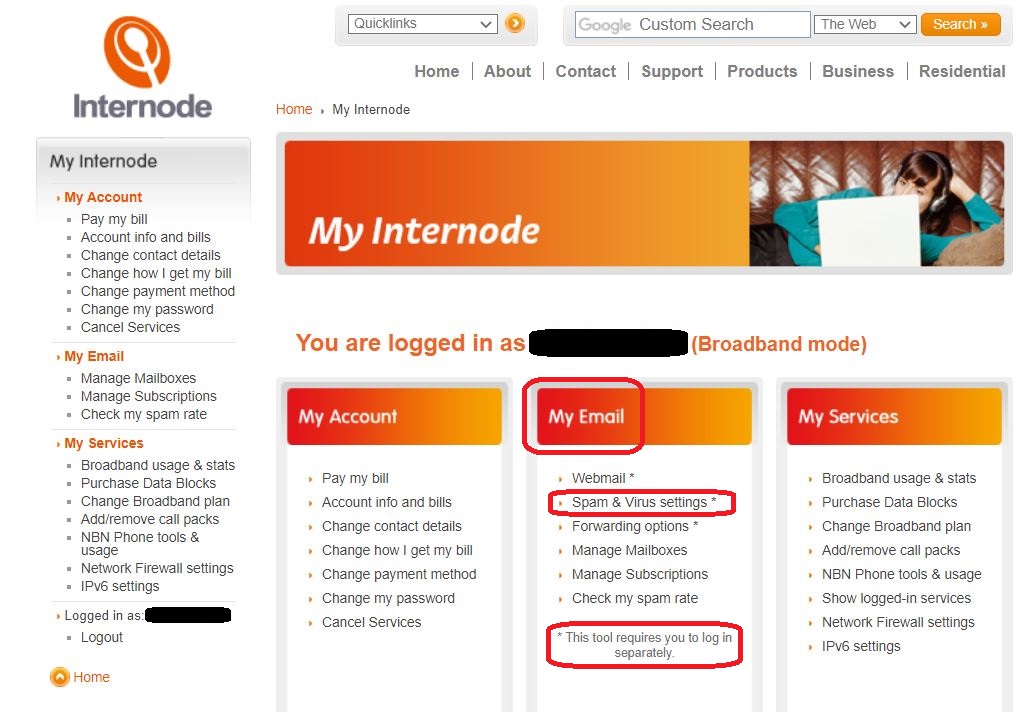
 ⇩ Note that you are looking at your Internode Account and not the Intenode Webmail application. In the centre block is a list of functions titled 'My Email'. The first three of these functions have an asterisk which refers you to a footnote that says to use these tools you will be asked to again enter your login credentials. (Observe that these three functions do not appear in the navigation pane on the left-hand-side of the screen.) From the centre block itself, click on 'Spam & Virus settings'
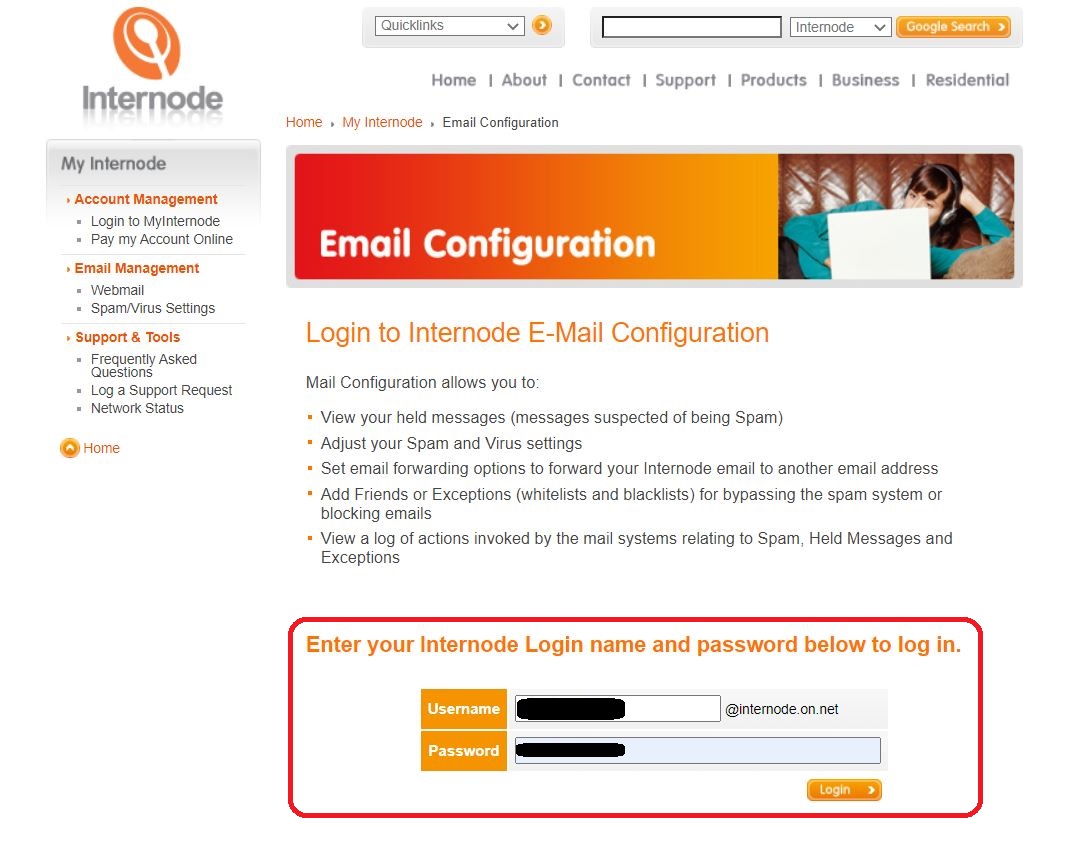
 ⇩ You are asked to 'Login to Internode E-Mail Configuration'. Enter your username and password where requested; note that the '@internode.on.net' already appears on the username row and so you only have to enter the bit that goes in front of '@internode.on.net'. When complete, click on the 'Login' button
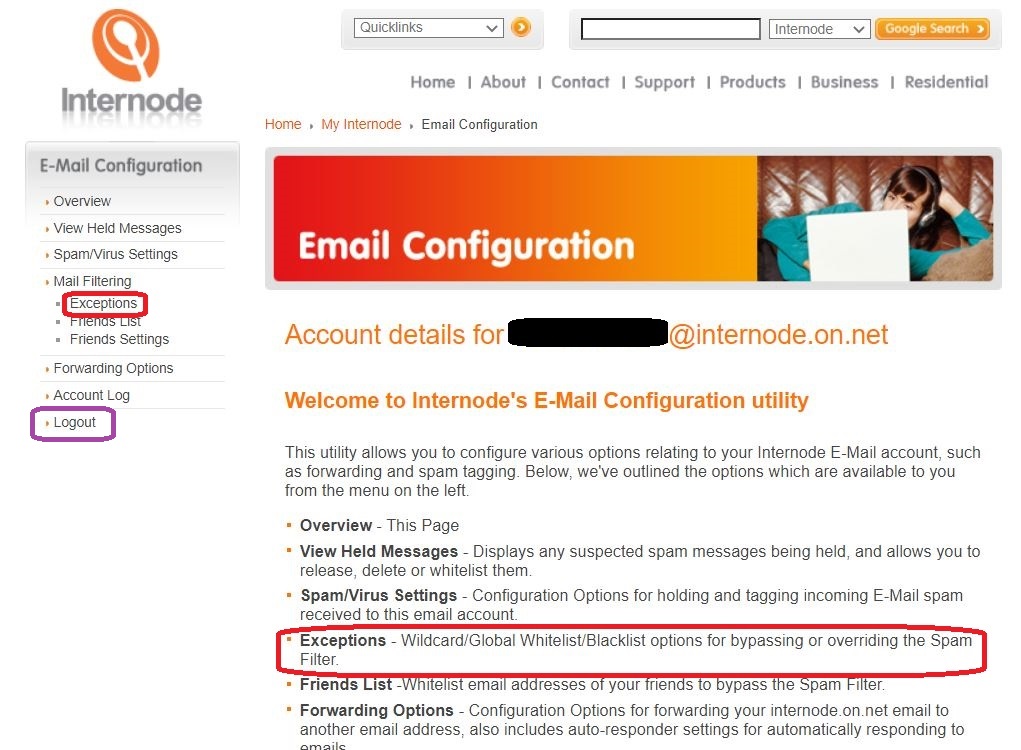
 ⇩ The next window gives you information about 'Internode's E-Mail Configuration utility'. The 'Exceptions' facility is the one that you need; click on 'Exceptions' in the left-hand-side navigation panel. (In passing, note the location - marked with a purple ring - of the 'Logout' button; you will be using that later)
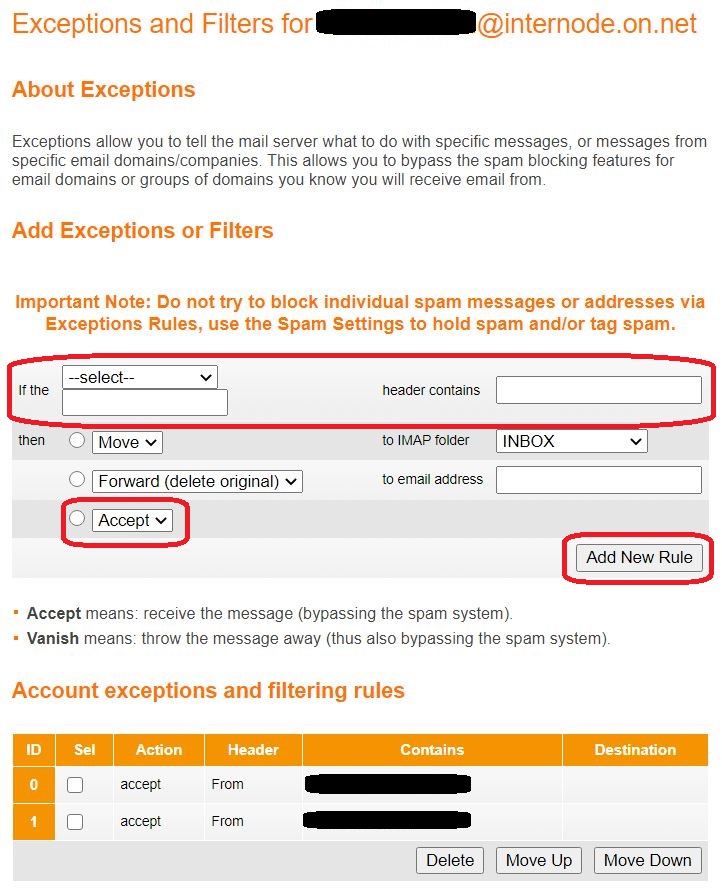
 ⇩ This window allows you to set exceptions and create filters. (Note at the bottom that there are two such already created in this example.) The three areas circled in red are the ones relevant to you
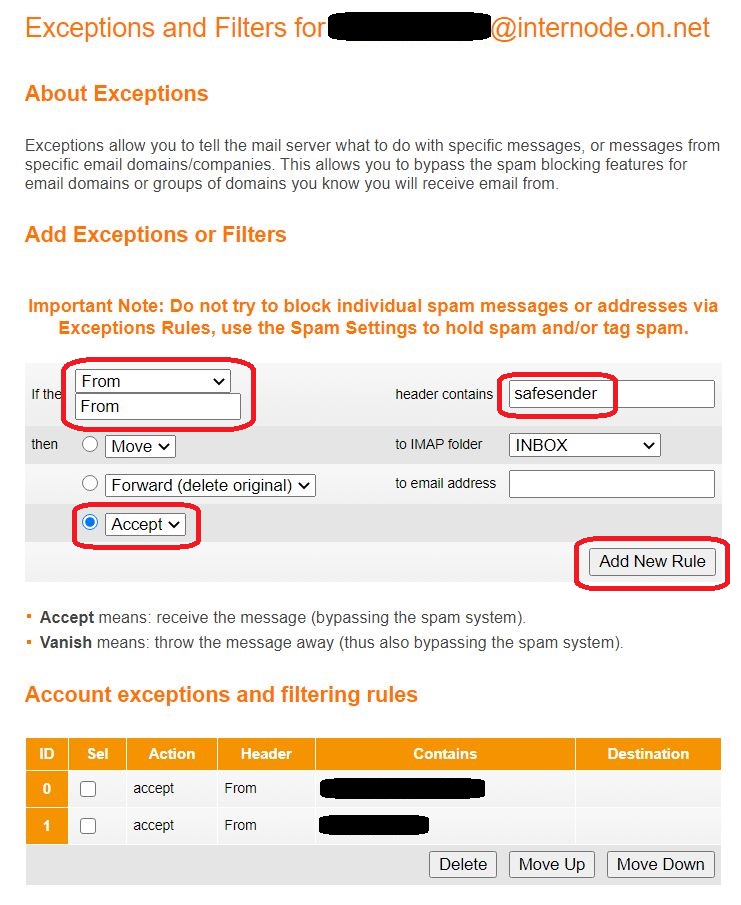
 ⇩ Select 'From' from the drop-down menu and enter ' safesender ' where shown. Click on the third radio button, ensuring 'Accept' is selected from the list of options. This is telling the server that if an email arrives which has ' safesender ' in its origin name, then it is safe to accept it and circumvent the Spam filter. Now click on the 'Add New Rule' button. You should now see safesender added to the bottom of the whitelist. Success! Logout of Internode's E-Mail Configuration utility by clicking on the 'Logout' button you saw on a previous screen-shot. This will log you out of Internode completely. You may now just simply close the web browser window
Disclaimer: Every effort has been made to present, as accurately as possible, all the information presented via this site at the time of publication.
However, no guarantees are implied nor any liability accepted with respect to its correctness when it is read.
Copyright Notice: Every effort has been made to use material subject to copyright only with the permission of the copyright holder.
Any infringement of copyright is therefore unintentional and will be corrected by notifying the webmaster.
Copyright © Alan John Branford
Last Update: 14 July 2021